Build Series: Vanlife Insulation Options
Welcome to the internet rabbit hole that is camper van insulation. Let’s get straight to it: there are endless options for vanlife insulation and there’s no simple way to determine what’s best for you and your van conversion. If you ask us, the “best van insulation” doesn’t exist – selecting insulation is a matter of your specific needs, travel plans, and budget. In today’s post, you’ll find a compilation of the research that we did when insulating our van and what ultimately worked for us.
What is Insulation?
First of all, what is insulation? It’s any material that stops the transfer of energy – in our case, that energy is either sound or heat. When people discuss campervan insulation, they’re most often talking about the transfer of heat, either into your van in the summer or out of your van in the winter, but today we’ll touch on acoustic insulation as well.
Acoustic Insulation
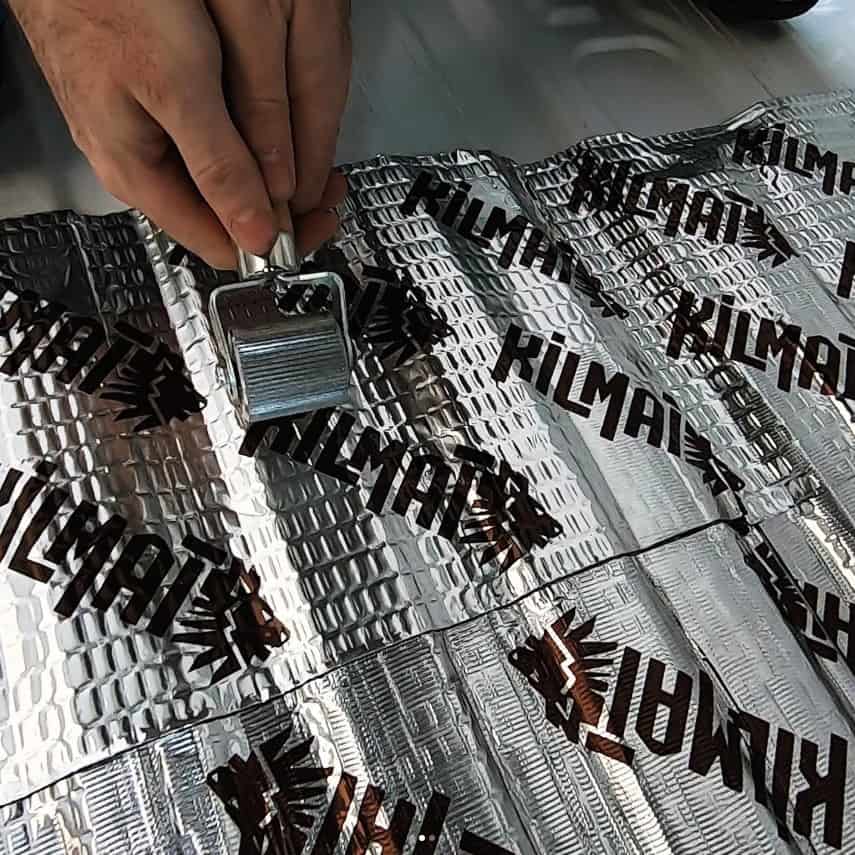
Acoustic insulation prevents sound from travelling and creates a more quiet interior, especially while driving. It can also be called sound deadening or soundproofing. We found that when it comes to acoustic insulation, the process is similar across brands. Most acoustic insulation either comes in sheets or rolls. Some can be simply placed in your van, others require rolling out and adhering to the floor or walls. When it comes to acoustic insulation, it’s a matter of weight vs. thickness vs. budget. The thicker the insulation, the better it’s going to be at preventing sound transfer. However, with thicker insulation comes a heavier weight and higher price.
Here are a few brands, including the one we went with: Kilmat.
Kilmat https://kilmat.com/
Fatmat https://www.fatmat.com/
Noico https://noico.info/
Dynamat https://www.dynamat.com/

Temperature Insulation
Now let’s get into what most people are looking for when researching van insulation: insulating for temperature. Regardless of season, insulating your van is going to be an important early step in your build. You’ll want to keep the heat in your van during cold weather and the cold in your van when the weather’s hot. However, the reality is that a campervan will never be the same as an actual house – the best campervan insulation job in the world isn’t going to keep you entirely comfortable when the temperatures outside are extreme. This is why we did a bit of research, found materials that we thought would work for us, and then moved on with our build. Although insulation is an important step, you can get stuck in this rabbit hole for ages. What’s the easiest way to start, according to us? Learning about R value so you can quickly compare materials as you research.
Measuring the Performance: What is R Value?
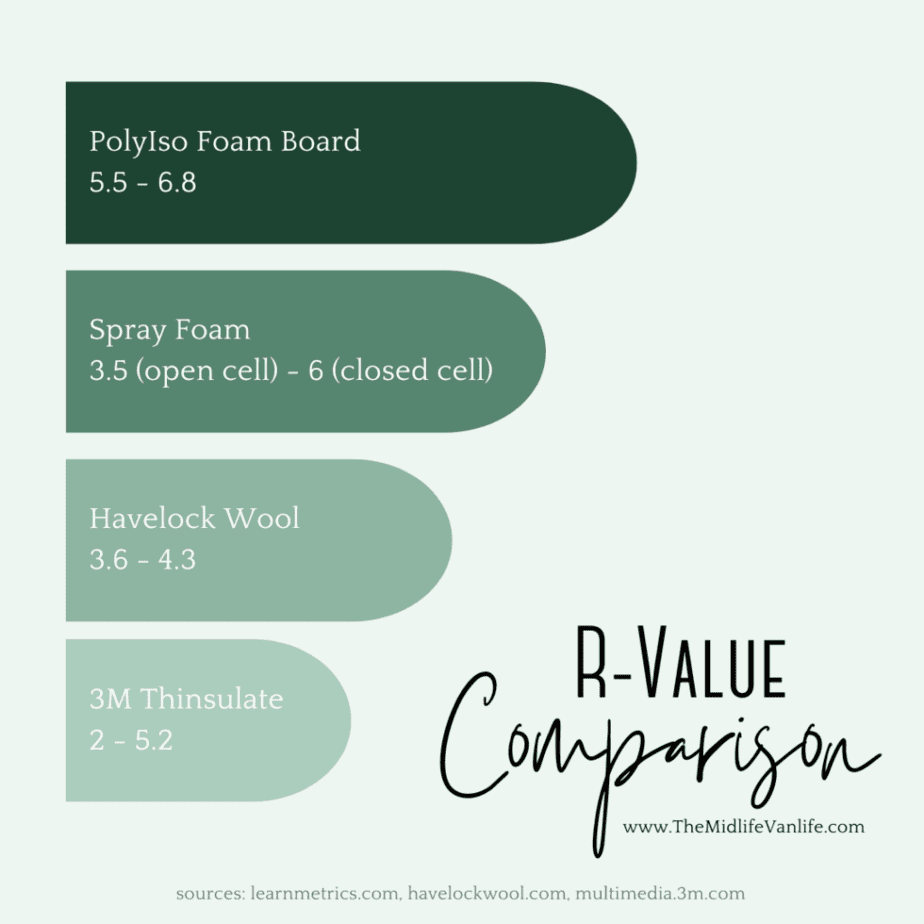
R value is a measurement of how well an insulating material holds heat. The greater the R value, the better the material is at preventing heat transfer. R value is an easy, standardized way to compare the performance of different types of insulation.

What are the Most Common Types of Insulation for Vanlife?
The types of insulation you’ll most often see in the vanlife community are foam spray, foam board, and wool. Although there are a variety of other materials vanlifers are beginning to use (such as recycled denim), today we’ll focus on the most common materials.
Spray Foam Van Insulation
Spray foam is a composite insulating material created when isocyanate and polyol resin (typically) are combined. There are two types of spray foam: open and closed cell. Generally, open cell spray foam is less dense with a lower R value. Closed cell spray foams are more dense but typically contain HFCs and are therefore less environmentally friendly.
Pros – generally high R value, excellent coverage in tight spaces
Cons – can warp van panels, can be messy, you may want to hire professionals to install spray foam, some contain HFCs
Where to find spray foam insulation and kits – Amazon, local hardware stores, and local insulation contractors/pros
PolyIso Foam Board Van Insulation
PolyIso is a rigid foam board insulation made of layers of foam core between two outer faces (often reflective material). It’s easily cut to shape and lightweight.
Pros – high R value, easy to install, lightweight, easy to find
Cons
Where to find PolyIso insulation
Wool Van Insulation
Wool is an easy to install, natural, biodegradable insulation option. Wool insulation can be blown or installed in batts, batts typically being used for vanlife.
Pros
Cons
Where to find wool insulation
3M Thinsulate Van Insulation
3M Thinsulate is a lightweight, thin form of insulation that comes in a variety of options (water resistant, featherless, stretch, etc) with a generally high R value.
Pros
Cons
Where to find Thinsulate
The Best Insulation for Our Campervan and Budget
We decided to go for a mixture of quality and price when converting our camper van. We also wanted an easy install process and we didn’t want to lose any interior height. Some vanlifers frame out their insulation and lay down multiple layers – although that looked like a great approach, it wasn’t an option for us given Joe’s height. Taking all of this into consideration, we went with the following for our vanlife insulation:
Our Van Ceiling: 1” PolyIso foam board. We cut the board to fit between the ribs of the van frame and used spray adhesive to attach it directly to the ceiling.
Our Van Walls and Frame: Havelock Wool batts. We used whole batts to line the walls and we pushed pieces of torn batts into the ribs of the van frame.
Our Van Floor: Cork mat. We found a thin cork mat that offered a bit of insulation without losing much height. We layered the cork on top of the Kilmat and below the factory Mercedes flooring. To complete the floor of our van, we’ll eventually install Lifeproof planks on top of the factory flooring (we just haven’t gotten that far yet, 18 months later…).
Results so far: We have been generally comfortable in our van! However, in extreme temperatures, our van gets both pretty chilly and pretty toasty despite the insulation. In our first year of traveling, we’ve found that without a heater or AC unit, we can exist very comfortably in the 50-80 degree range (F). With fans, our Fresair unit, or blankets, we’ve been pretty comfortable from the 40s to the 90s (F). Outside of that range, it starts getting a little too warm or too cold to comfortably exist in our van, but that works for us and where we travel.


Ready To Go Down the Vanlife Insulation Rabbit Hole?
Good luck! Here are some resources we used when planning the insulation for our campervan:
- Far Out Ride https://faroutride.com/
- Sara and Alex James https://saraandalexjames.com/
- Gnomad Home https://gnomadhome.com/van-build-insulation/
- Energy Star Recommended Regional R Values – click here
- All About R Values – click here
Until next time,
~ The MLVL

